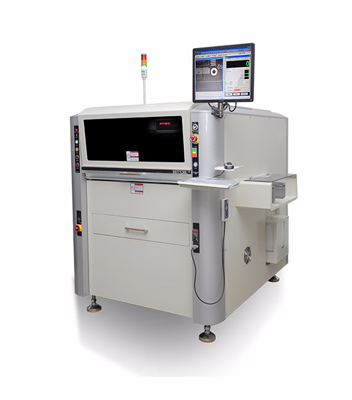
1. Click the "new project" icon, write the model name in the pop-up "create new directory" window, and click "confirm" after filling in it.
2. Enter the data editing interface and fill in the product name, product model and PCB length, width and thickness (Note: fill in the length, width and thickness are the actual dimensions of the board and cannot be entered at will), Select the direction of entering and leaving the board, and other parameters in the interface will automatically generate default parameters according to the length and width of the board, which can be modified according to the actual situation of production, and then click "next".
3. After setting the parameters, click "next" to prompt whether to adjust the track width. Click "yes". After the track width is adjusted, it will jump to the editing window on the second page, take a plate for production, place it on the track, confirm the width of the track and confirm the track
4. After the width is OK, place the board at the entrance of the track and correctly place the top pin on the platform (panel a and B can enter the board first, click the guide rail to release, and then put the top pin), and click "automatic positioning";
5. After the plate is clamped into the guide rail, click "CCD return" → "steel mesh down to the printing position" (Note: check whether there is a support block under the mesh frame and the guide rail. If it is blocked, move the support block to the middle), click "steel mesh width valve" and "steel mesh positioning valve", and then place the steel mesh for production on the mesh frame, Align the position of the steel mesh and the pad (in the case of double illumination, the pad can be seen by the naked eye, and 100% alignment is required for single illumination). The left and right mesh frames shall be close to the steel mesh as far as possible, and then click "steel mesh fixed cylinder" and "steel mesh width valve", and click "steel mesh rises to the image taking position".

6. Click "mark point setting", and then the following? Click diagonally with the left mouse button, the words 1 and 2 will appear, and then click "PCB mark 1" to enter the template customization interface. Move the direction key on the keyboard to the position of PCB mark 1. Make the image black and white by adjusting the brightness of LED1 and LED2 light sources, and then click the "automatic matching" button to automatically capture the center of mark point, If the score is lower than 90, the brightness shall be adjusted again. Click the confirm button to enter the next step;
7. Then click "steel mesh mark 1" to adjust the brightness of LED3 and LED4. (Note: if the steel mesh mark is not in the middle of the screen, do not move the lens) directly click "automatic matching". If the score is lower than 90, the brightness needs to be adjusted again.
8. Similarly, make PCB Mark 2 and steel mesh Mark 2, click "OK" to pop up the "platform return or plate loosening" window, click "yes", then take out the PCB at the track entrance, and the program is completed.
9. After the program is made and the scraper is installed before production, please pay attention to adjust the position device in the following picture, and adjust the center of the scraper before and after, otherwise it will press on the steel grid frame and cause damage to the scraper or steel grid.
10. The characteristics of automatic solder paste printing machine are very good. Compared with the traditional one, it is more simple and human. We only need to have a comprehensive understanding of it before operation and fully understand each feature. Only in this way can we give full play to its good features!
This completes a production template. Click production to use it